InfoHeap
Tech
Navigation
  • Home
  • Tutorials
    • CSS tutorials & examples
    • CSS properties
    • Javascript cookbook
    • Linux/Unix Command Line
    • Mac
    • PHP
      • PHP functions online
      • PHP regex
    • WordPress
  • Online Tools
    • Text utilities
    • Online Lint Tools
search

Ubuntu tutorials

  • How to add a user on Linux with sudo access
  • How to check if a user has password on Linux
  • How to install ViewVC for svn repository on Ubuntu Linux
  • How to setup ssl (https) for your site on Ubuntu Linux
  • Install rabbitmq on Ubuntu Linux
  • LXC (Linux Containers) - quick start tutorial on Ubuntu
  • Linux - command to check swap size
  • Linux - how to add a user using useradd
  • Linux - how to create a large file like 1GB
  • Linux - how to create swap partition
  • Linux - how to remove user from a group
  • Linux - number of cpus (lscpu)
  • Linux du - find disk usage of directories or files
  • NFS client and server handy commands
  • Setup svn repository on AWS Ubuntu with apache auth
  • Ubuntu - check if a service is upstart based
  • Ubuntu - dpkg and apt-get beginner tutorial
  • Ubuntu - find file to package
  • Ubuntu - find where will a package be installed from
  • Ubuntu - how to auto start services on boot using update-rc.d (sysv init)
  • Ubuntu - how to find boot autostart status of a service
  • Ubuntu - reload iptables rules during boot
  • Use x2go to access remote Ubuntu Linux
 
  • Home
  • > Tutorials
  • > Linux

How to setup svn repository on AWS Ubuntu Linux with apache simple auth

By admin on Apr 14, 2013

Svn (Subversion) is one of the popular options for maintaining source code versions and revisions on Linux. Here are the steps to install and setup svn repository on Ubuntu Linux with Apache web simple auth.

  1. First install subversion main package and apache subversion module
    sudo apt-get install subversion
    sudo apt-get install libapache2-svn
  2. Create a test directory and a file to import into repository. This step can be skipped if you want empty repository.
    mkdir mytestproj
    vi mytestproj/README.txt (with some text)
  3. Create a home for repositories and create a repository named repo1.
    sudo mkdir /svn
    sudo chown www-data:www-data /svn
    sudo -u www-data mkdir /svn/repos/
    sudo -u www-data svnadmin create /svn/repos/repo1

    Here we are making all directories owned by www-data as apache runs as user www-data and should be able to write in these directories.

  4. Import the test directory into the repository repo1. You can skip this step if you want an empty repository.
    sudo -u www-data svn import -m "mytestproj import" mytestproj file:///svn/repos/repo1/mytestproj
  5. Look at the sample conf file at (/etc/apache2/mods-available/dav_svn.conf). Create your own apache conf file (e.g. /etc/apache/conf.d/my_svn.conf) with the following configuration:
    <VirtualHost *:80>
      ServerName svn.yourserver.com
      <Location /repos>
        DAV svn
        SVNListParentPath on
        SVNParentPath /svn/repos/
        AuthType Basic
        AuthName "Authorization Realm"
        AuthUserFile /etc/auth-file-svn
        Require valid-user
      </Location>
    </VirtualHost>

    Replace svn.yourserver.com with the appropriate host name. Also make sure that DNS entry exists.

  6. Create /etc/auth-file-svn using htpasswd
    sudo htpasswd -c /etc/auth-file-svn [username]

    The username should be desired username for svn checkins. The htpasswd command will ask you for password. The option -c is only needed for first user creation as it will create the file /etc/auth-file-svn.

  7. Restart apache using
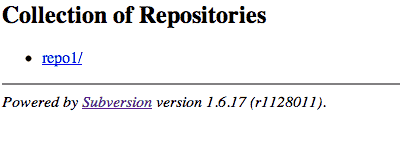
 sudo service apache2 restart and access http://svn.yourserver.com/repos/. You should see the list of repositories as shown below.
    sample-svn-repo-list 
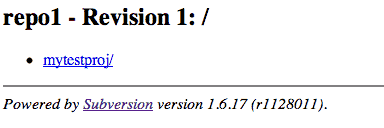
Now click on repo1 repository. This corresponding url is http://svn.yourserver.com/repos/repo1/. Here is how it should look:
    sample-svn-repo1-mytestproj
  8. To checkout the repository repo1 you can use the following command:
    svn co http://svn.yourserver.com/repos/repo1


Suggested posts:

  1. How to migrate your site from one domain to another
  2. Why and how to log Content-Type in apache access log
  3. Disable directory listing in apache
  4. How to join multiple pdf files on Mac
  5. PHP sort associative array using custom compare function
  6. Bash – variables in double quotes vs without quotes
  7. Php apc vs memcache
  8. Block directory access using htaccess 404
Share this article: share on facebook share on linkedin tweet this submit to reddit
Posted in Tutorials | Tagged Linux, Tutorials, Ubuntu Linux
  • Browse content
  • Article Topics
  • Article archives
  • Contact Us
Popular Topics: Android Development | AngularJS | Apache | AWS and EC2 | Bash shell scripting | Chrome developer tools | Company results | CSS | CSS cookbook | CSS properties | CSS Pseudo Classes | CSS selectors | CSS3 | CSS3 flexbox | Devops | Git | HTML | HTML5 | Java | Javascript | Javascript cookbook | Javascript DOM | jQuery | Kubernetes | Linux | Linux/Unix Command Line | Mac | Mac Command Line | Mysql | Networking | Node.js | Online Tools | PHP | PHP cookbook | PHP Regex | Python | Python array | Python cookbook | SEO | Site Performance | SSH | Ubuntu Linux | Web Development | Webmaster | Wordpress | Wordpress customization | Wordpress How To | Wordpress Mysql Queries | InfoHeap Money

Copyright © 2025 InfoHeap.

Powered by WordPress