AWStats is a powerful and featureful tool to analyze apache access logs. Using AWStats, you can view various stats 404, etc. Here are steps to install AWStats on Ubuntu Linux:
Install AWStats package on Ubuntu Linux
$ sudo apt-get install awstats
To see files in package awstats:
$ dpkg -L awstats
AWStats configuration
Edit awstats config file at location /etc/awstats/awstats.conf.local using sudo. Depending upon you log file name and domain name change the value of LogFile and SiteDomain.
Case 1
You log file is access_log
LogFile="/var/log/apache2/access.log"
SiteDomain="yourdomain.com"
Case 2
You log file is access_log.YYYY-MM-DD
LogFile="/var/log/apache2/access_log.%YYYY-0-%MM-0-%DD-0"
SiteDomain="yourdomain.com"
AWStats crons
As part of the package installation AWStats also installs cron which runs as www-data to populate data in /var/lib/awstats/. To view the cron entries, run the following:
$ cat /etc/cron.d/awstats
MAILTO=root

*/10 * * * * www-data [ -x /usr/share/awstats/tools/update.sh ] && /usr/share/awstats/tools/update.sh

# Generate static reports:
10 03 * * * www-data [ -x /usr/share/awstats/tools/buildstatic.sh ] && /usr/share/awstats/tools/buildstatic.sh
You may want to change MAILTO value to you email address.
AWStats data location
Since cron runs every 10 min, wait for few minutes (max 10 minutes) and you should be able to see data files in /var/lib/awstats/
$ sudo ls -l /var/lib/awstats/
total 24
-rw-rw-r-- 1 www-data www-data 15723 Nov 27 17:10 awstats112015.txt
-rw-rw-r-- 1 www-data www-data  7014 Nov 27 17:10 dnscachelastupdate.hash
AWStats apache configuration
Not setup apache conf by copying and editing sample apache conf present in awstats package.
$ sudo cp /usr/share/doc/awstats/examples/apache.conf /etc/apache2/conf-enabled/awstats.conf
Replace ScriptAlias /cgi-bin/ /usr/lib/cgi-bin/ in awstats.conf with the following line.
ScriptAlias /awstats/awstats.pl /usr/lib/cgi-bin/awstats.pl
AWStats ui
Now check the config syntax and if everything is fine, then restart apache.
$ sudo apache2ctl configtest
$ sudo apache2ctl restart
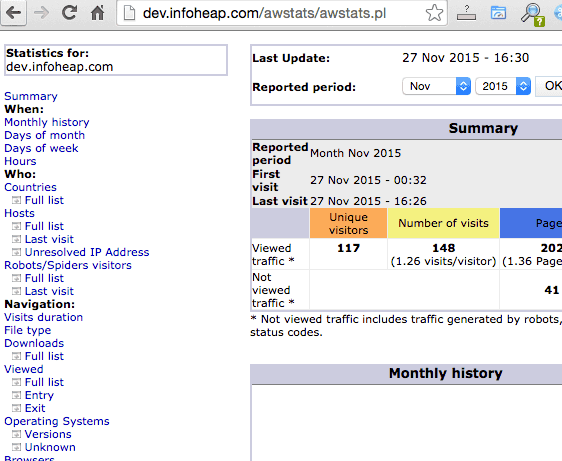
Now visit your awstats site at the url /awstats/awstats.pl. Here is how it should appear:

Add basic apache auth to AWStats
We should also add auth to AWStats urls. Create an auth files using htpasswd. We’ll create user awstats in file /etc/auth_awstats with desired password.
$ sudo htpasswd -c /etc/auth_awstats awstats
Add the following config in awstats.conf to enable http basic auth:
<LocationMatch /(awstats/awstats.pl|cgi-bin/awstats.pl)>
  AuthType Basic
  AuthName "Restricted Resource"
  AuthBasicProvider file
  AuthUserFile /etc/auth_awstats
  Require valid-user
</LocationMatch>
Note that we added cgi-bin/awstats.pl also in above config. In case your apache server has /cgi-bin/ configured, it may make /cgi-bin/awstats.pl accessible. So we should protect that also.
AWStats – check if auth is working
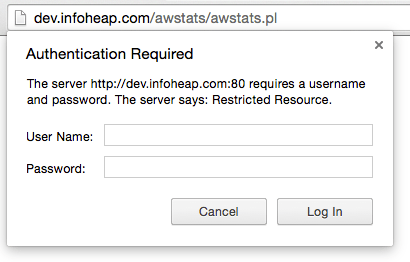
Restart apache for the config to take effect. Now when you access the url /awstats/awstats.pl, you will see username and password prompt as shown below:
