You may need ssl for your site for multiple reasons. I needed it for facebook apps. So my requirements are not so strict. For building a facebook app you need to have ssl installed on your site. There are many types of certificate you can buy. Either you can take wildcard certificate which is costly or you can also take it for a specific domain. If you take it for a specific domian, then it would not work for its subdomains.
One of the cheapest option is to take Positive SSL certificate from NameCheap. It comes under $10 per year. This does not validate physical address of your company and only validates that domain is owned by you. So you may want to look at more strict options depending upon your needs.
Here are the steps to setup the certificate (Positive SSL certificate for one domain):
- First generate a certificate signing request (CSR). For apache2 use openssl as shown below:
openssl req -nodes -newkey rsa:2048 -keyout myserver.key -out server.csr
It will ask you following details:
Country Name (2 letter code) [AU]:
State or Province Name (full name) [Some-State]:
Locality Name (eg, city) []:
Organization Name (eg, company) [Internet Widgits Pty Ltd]:
Organizational Unit Name (eg, section) []:
Common Name (eg, YOUR name) []:
Email Address []:

Please enter the following 'extra' attributes
to be sent with your certificate request
A challenge password []:
An optional company name []:
For common name if you are requesting a domain specific certificate, then enter the FQDN (fully qualified domain name) here. e.g. apps.infoheap.com. For A challenge password, enter anything and make sure you make a note of it.
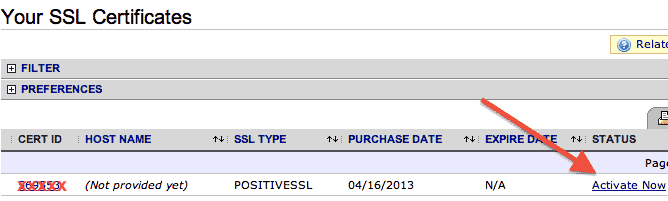
It will generate server.csr and myserver.key files. File myserver.key contains your private key should never be shared with anyone. File server.csr contains certificate request details and will be needed later. - Goto SSL list page in myaccount on Namecheap.com and click on activate now for the certificate you bought.
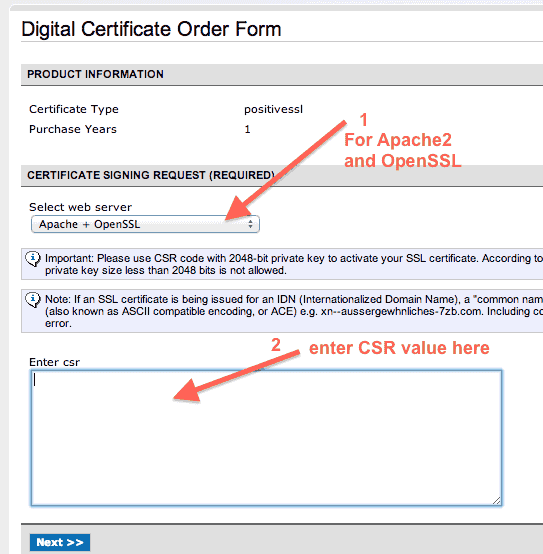
- Keep the CSR (from file server.csr) handy. When you click Activate now, you will see the following screen. Select Apache + OpenSSL and and enter CSR value in the appropriate box. This is assuming you are using Apache2 and OpenSSL.
- Next screen you will be asked to select approver email as shown below.
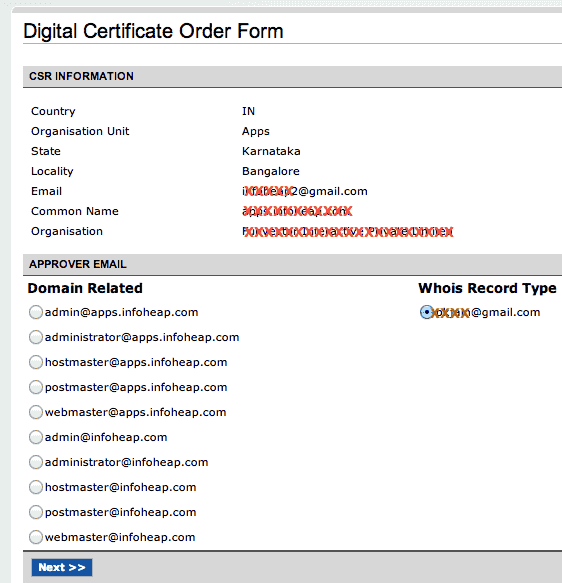 This is to ensure that you have access to domain owner’s email address. In case your domain registration info is public, then domain owner’s public email from whois record will be shown as an option. You can select that. Otherwise you may have to select postmaster@domainname.com. Whoever is providing you private registration, will provide you an option to forward all emails received on postmaster@ address.
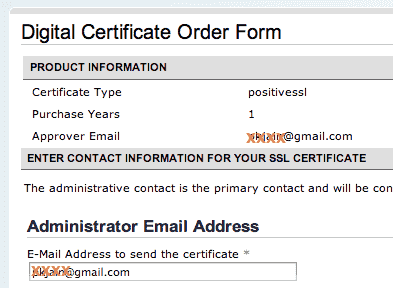
 - Next screen will be a confirmation screen as shown below:
- If everything goes fine, you will see a congratulations message and following screen describing the process summary and what are the next steps.
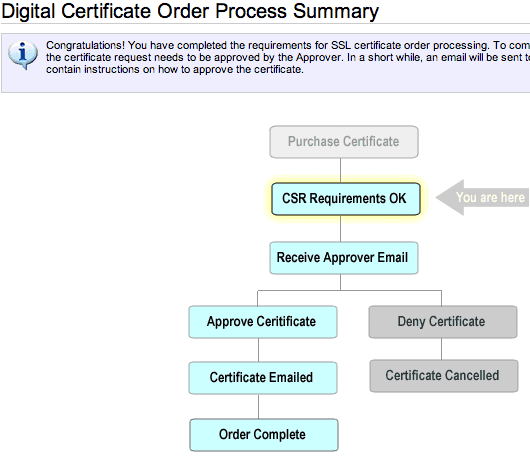 The only step left is for Approver to approve the request.
 - You get the email which will look like this:
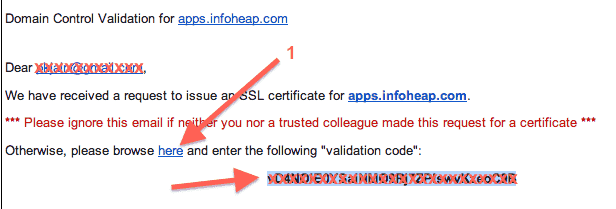 To approve click on the link provided and enter the validation code as described in the email.
 - Once approver approves the request, the domain owner will get an email containing certificate files in zip format.
Attached to this email you should find a .zip file containing:
  - Root CA Certificate - AddTrustExternalCARoot.crt
  - Intermediate CA Certificate - PositiveSSLCA2.crt
  - Your PositiveSSL Certificate - apps_infoheap_com.crt
The .crt file is your certificate and and myserver.key file generated above is your private file. Copy these to ssl-cert-my.pem (public certificate) and ssl-cert-my.key (private key) and move to the Ubuntu Linux server with Apache2 installed.
- Next step is to configure apache and enable ssl. Run these commands:
sudo a2enmod ssl
sudo a2ensite default-ssl
- Edit /etc/apache2/sites-enabled/default-ssl. Copy the section within <VirtualHost *:443> and create one more section for the site you obtained the certificate. Create appropriate entries for ServerName etc. e.g.
ServerName apps.infoheap.com
DocumentRoot /path/to/your/document/root
And copy File ssl-cert-my.pem to /etc/sss/certs/ directory and sss-cert-my.key to /etc/sss/private/ directory. Make sure that /etc/ssl/private/ssl-cert-my.key permissions are 640 and is in group ssl-cert.
sudo chmod 640 /etc/ssl/private/ssl-cert-my.key
sudo chown root:ssl-cert /etc/ssl/private/ssl-cert-my.key
Point SSLCertificateFile and SSLCertificateKeyFile to correct entries as shown below (change the file path values):
SSLCertificateFile /etc/ssl/certs/ssl-cert-my.pem
SSLCertificateKeyFile /etc/ssl/private/ssl-cert-my.key
- Now restart Apache2 using sudo service apache2 restart and access your server on https. e.g. https://apps.infoheap.com/. If everything is fine, then no ssl warning should come.
Additional notes
- This article assumes you have Ubuntu Linux and buying certificate from namecheap.com. But in case that is not true, you can still use it as a high level guideline and follow the steps for your environment.
- In this whole process, your private key always remains with you right from the initial key generation. Only your certificate comes in email. You should keep a backup of it at few places.
- If you lose your private, there is no way to recover it. You will have to apply for a new key and follow the complete process again.


