[Update: This post is applicable for Amazon classic infrastructure. Now you should use Amazon VPC infrastructure and steps may be slightly different. We’ll soon write another post for that.]
Setting up wordpress on Amazon cloud using EC2 is one of the most popular options. You can either use Centos or Ubuntu linux if you are looking for cheaper options without support. Red Hat Enterprise lunux is slightly more costly. We’ll use Ubuntu for this article. When you are starting up, you may want to take a micro instance as there won’t be much traffic initially. In case you anticipate lot of traffic soon, then you can consider small or other instances.
Steps to setup the instance
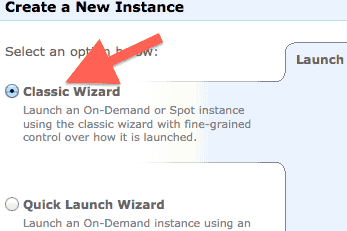
- First login to Amazon AWS console and click on launch instance. The create new instance screen, choose Classic wizard.
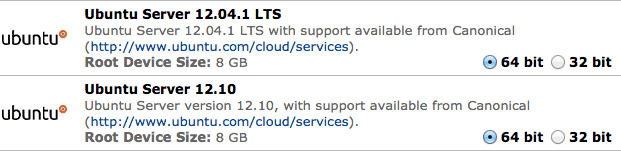
- At the time of writing this article, there are two Ubuntu linux flavors:
- Ubuntu server 12.04.1 LTS (with support available from canonical)
- Ubuntu server 12.10 (with support available from canonical)
You can choose any of these. LTS version mean it will have long term support as compared to other one. As per Ubuntu release page:
Normal Ubuntu releases are supported for 18 months. Previous Ubuntu LTS (Long Term Support) releases are supported for 3 years on the desktop and 5 years on the server. Starting with Ubuntu 12.04 LTS, LTS releases will be supported for 5 years on both the desktop and the server.
Some people may prefer normal release as it has higher version. We’ll choose LTS version.
- Choose EC2 classic on instance details screen. Proceed with default options till you reach key value screen on instance details. Give a name to your instance. e.g. test-ubuntu-instance.
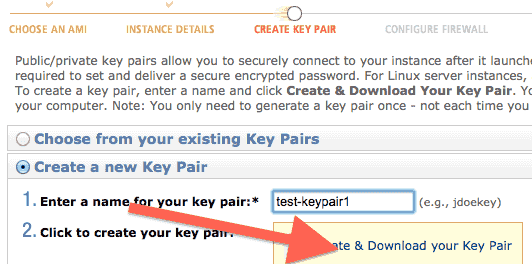
- Continue till you reach create a key pair section. Create a new keypair and download it. You will need it later to login. You can also use an existing key pair.
- Continue and complete remaining steps and launch the instance. You may optionally want to enable termination protection during the setup flow when it is asked. You can do it from EC2 console as well later. I believe this is to prevent accidental termination using API. If you don’t intent to use API, this option does not matter.
Steps to setup softwares on the server
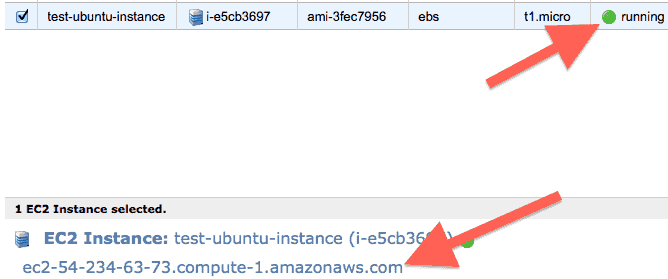
- Once the server is setup, find its name from EC2 console by clicking on instances in left menu.
- Change the permission of the key pair file (.pem extension) you downloaded to 600. This step is for macbook which should work on any linux machine. In case you are using windows machine, the ssh connection method will change accordingly.
chmod 600 test-keypair1.pem
If this is not done, ssh won’t work.
Now login to your instance using this command:ssh -i test-keypair1.pem -l ubuntu ec2-54-234-63-73.compute-1.amazonaws.com
Replace the keyfile and hostname appropriately.
- Now install apache2 on the ubuntu server box using
sudo apt-get update
sudo apt-get install apache2
If it works fine, then you should be able to hit http://yourhostname.com/ and a default page should appear similar to this:
It works!

This is the default web page for this server.

The web server software is running but no content has been added, yet.
you can also see the status of apache2 using:
$sudo service apache2 status

Apache2 is running (pid 3918).
In case apache2 is running but web page does not work, you may have to open port 80 using security groups on AWS console.
- Now install mysql and php5 using these commands:
$sudo apt-get install mysql-server
$sudo apt-get install php5
$sudo apt-get install php5-mysql
- Test php installation by creating a file info.php in /var/www2/ with following content
<?php
phpinfo();
?>
Now open http://yourhostname.com/info.php in the browser. You should see the installed php info.
- Enable these apache modules also
$sudo a2enmod rewrite
$sudo a2enmod expires
In case you get these warnings
perl: warning: Setting locale failed.
perl: warning: Please check that your locale settings:
Then run this:
$export LC_ALL="en_US.UTF-8"
- The default docroot folder is /var/www. For wordpress it is better to create a new root. e.g. /var/www2
$sudo mkdir /var/www2
$sudo chown ubuntu /var/www2
(You can make some other user as owner of this dir)
- Create your apache conf file (e.g. yourhost_vhost.conf) in /etc/apache2/conf.d/ with something like this:
Options -Indexes
<VirtualHost *:80>
  ServerName youhostname.com
  DocumentRoot /var/www2
  <Directory /var/www2>
    AllowOverride All
  </Directory>
  RewriteEngine on
</VirtualHost>
Restart apache now using:
$sudo service apache2 restart
- Now download the wordpress (latest version is 3.5.1 as of now), unzip it in /var/www2 dir. Access http://yourhostname.com/ from browser and follow regular wordpress installation process. You will need to download zip utility also for unpacking wordpress download.
$sudo apt-get install zip
- When your are asked for a db name create a mysql db using this command:
echo "create database blog;" | mysql -u root -h localhost
- Use blog as your wordpress db name (or whatever you created) and root as user in installation flow. The default password is blank.You may also want to change it later. Use wp_ as table prefix and leave other settings to default.
- The web installation flow will ask you to create wp-config.php. Copy the content and create a file wp-config.php in /var/www2/ with this content using vi or some other editor.
- Create wordpress admin user and password whenever asked. and proceed to login.
- Thats it! Congratulations on installing wordpress! You can hit http://yourhostname.com/ to view the blog and http://yourhostname.com/wp-admin for writing.
Some points to note
- AWS hostname may change if the instance is restarted. In one of the steps apache conf file needs to have host name for virtual host configuration. Ideally you should get a domain name and public IP address for your instance and set the DNS aname entry to that IP.
- Default apache2 access log is at /var/log/apache2/access.log and error log is at /var/log/apache2/error.log


