MailChimp is very popular tool to manage email campaigns/newsletters. The first step in setting up any campaign or newsletter is to create an email list and possibly import some existing emails to that list. The list also gives you user subscription embeddable code for your website and takes care of other functions like user un-subscription, etc.
Here are the main steps to create email list in MailChimp:
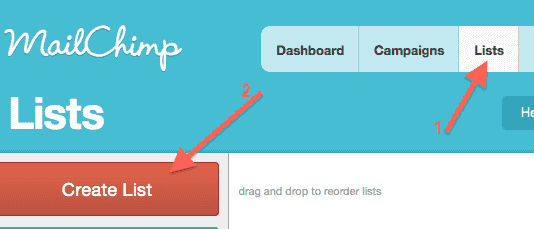
- First create an account on mailchimp.com. Login to MailChimp and click on lists tab and the create list button.
- Fill the fields like list name, Default from name, reply to email, subject, and other fields like adress, etc. Here is how the setup new list form looks like:
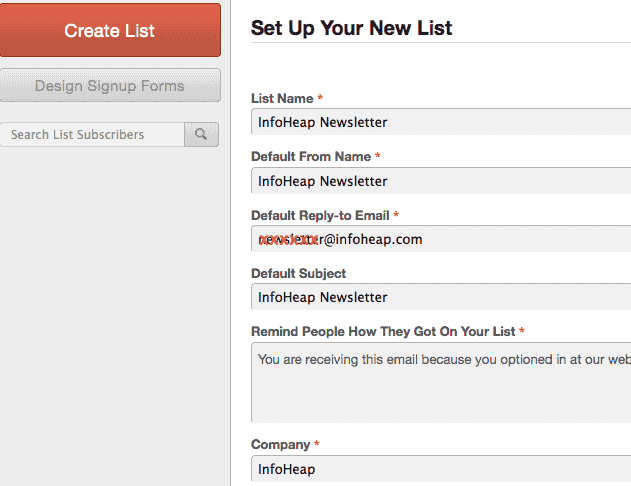 Please note that the reply-to email will have to be verified before you can send emails from that address. It will be done in a later step.
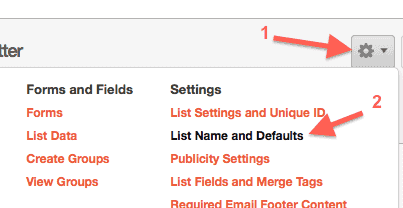
 - Click on setting icons and then “list name and defaults” as shown below.
 This will open up screen which will also have option to verify email. Here is how it looks like:
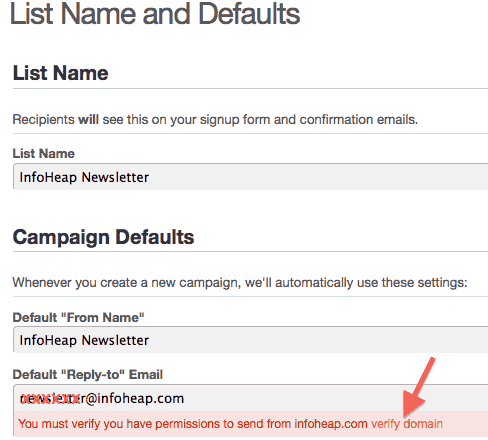 Click on verify email. This will send you an email with verification link. Once you click on that link, your email will appear as verified email.
 - Now if you want to import some existing subscribers (in case you are migrating from some other list), you can go to settings -> subscribers -> Import as shown below:
 MailChimp lets you import existing email addresses by couple of ways. You can either import using a file upload or copy paste (e.g. from excel). If the list is small, I think copy/paste option is most convenient.
 - Now create a form which can be used on the website. Click on settings and them forms as shown below:

- Remove First name and last name from the signup form unless you want to keep them. Here is how signup form (in builder) looks like:
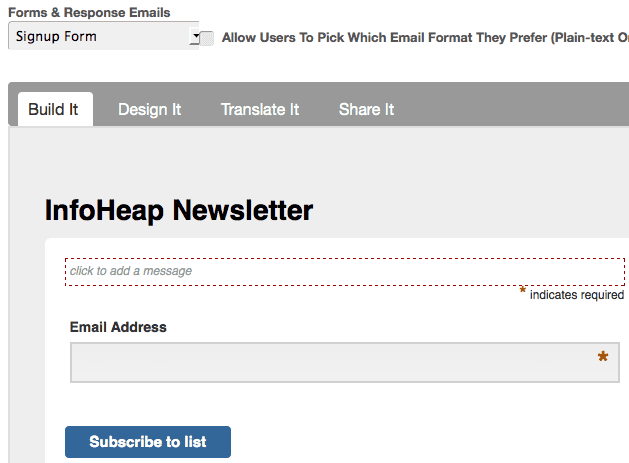 Click on share it and then click on create form html. Here is the preview of signup form which will appear on your website.
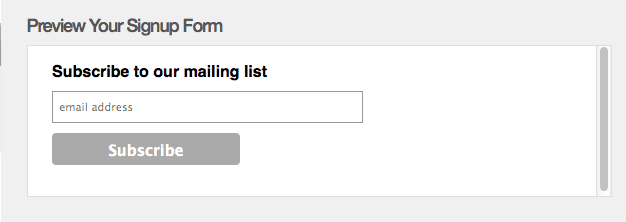 Copy the form code and put it at appropriate place on your site. Note that you can also put html link on your site instead of form. In that case user is taken to signup form on MailChimp site.
 - There are couple of other forms related to lists. In case you dont want to display you address on Signup Thank You page, Confirmation Thank You page, etc., you can edit these forms and remove the following line:
*|HTML:LIST_ADDRESS_HTML|*
An email list needs to be created before you can create an email newsletter campaign in Mailchimp. You can use one list for one or more email campaigns.
See also: How to setup MailChimp Rss email campaign