[Update: Authorship is no longer supported by google. You may also want to visit Google rich snippet documentation.]
Google displays author information in search results to help users discover great content. For this the blogger needs to verify the authorship of the blog using Google+ profile.
Here is a sample search result with verified author information:

Benefits for becoming verified author
- It helps user discover good content written by credible authors as compared to some anonymous content.
- I believe it will also help in SEO. Editorially created content by credible authors is always more relevant and up-to-date from user’s perspective.
How to verify authorship
WordPress steps
Here are the steps needed in wordpress admin ui to verify you blog authorship:
- Create a google plus profile with same name as Author Name. It is best to use same name which you are using as blog author.
- Install wordpress seo plugin. Go to user profile from wordpress admin page by clicking users and then your profile as shown below:
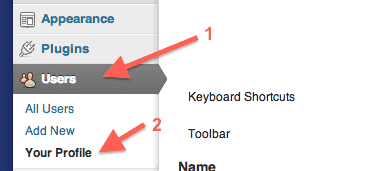 In case you need to verify authorship for some other user, then you can select that user from all users page. Then look for Google+ profile text box.
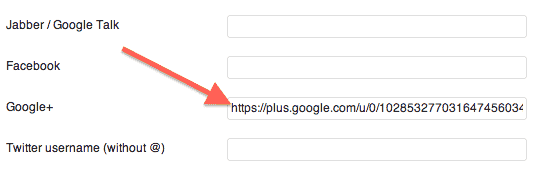 Enter the author’s Google plus profile url. It should look something like this – https://plus.google.com/u/0/102853277031647456034/posts
 - After saving, view some blog post and view its html source code. You should see this kind of entry between <head> and </head>
<link rel="author" href="https://plus.google.com/u/0/102853277031647456034/posts"/>
Google plus steps
Now we need to complete the steps required at google plus. You should also read the Google help – Author information in search results – webmaster tools help. We’ll follow the option 1 mentioned on the help page.
- Make sure you have an email address on the domain of your blog. e.g. john@infoheap.com
- Visit the Authorship page and enter the email address on the blog domain as show here:
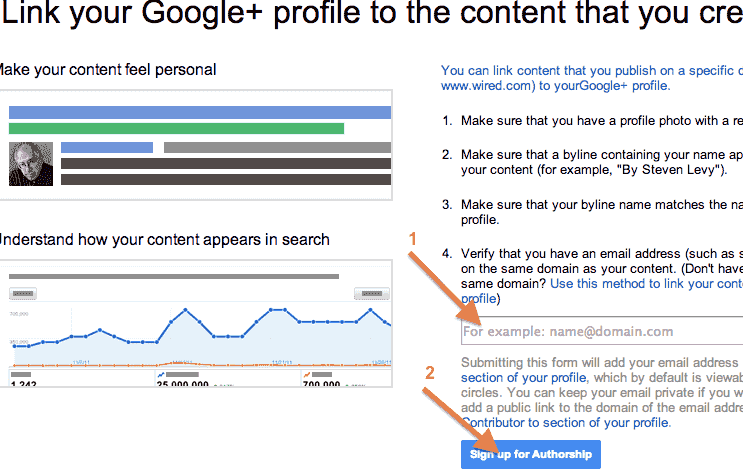
- Once this step is done, Google will send you an email for verification. Click on the link to verify once you receive the email.
- It will take some days before the verified author image and link appears in search results. Meanwhile to verify is everything is correct, you can visit Google structured data testing tool and preview a page which has author indormation in it. Here is how the preview should look:
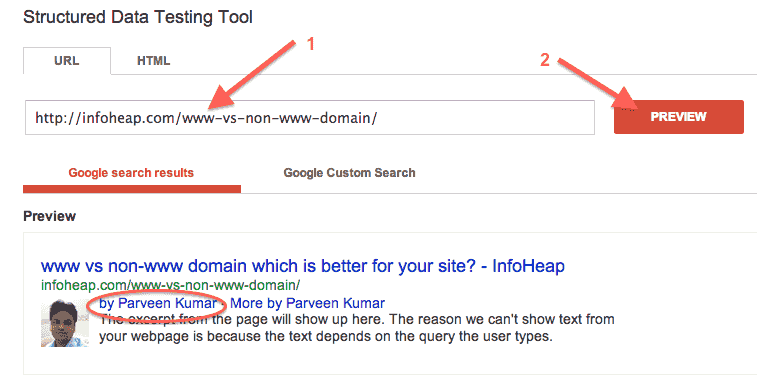 If everything is correct, you should see by “Author Name” in the search result preview.
Some points to note
- We used WordPress Seo plugin to add <link rel=”author” href=”…”/> in header of the page. In case you are not using this plugin, you can write a small custom wordpress plugin with code similar to:
function add_author_info() { // Do something .... } add_action('wp_head', 'add_author_info'); - We used option 1 (Link your content to your Google+ profile using a verified email address) as mentioned in the doc – Authorship information in search results. This has the benefit that you just need to do this step only once per author. This may not be best option if you are a guest author to some blog and don’t want to give Carte Blanche to the blog site to use your name for any of the posts. In that case you should go with option 2 (Set up authorship by linking your content to your Google+ profile).


