Windows does not have telnet program enabled by default. Telnet is a handy tool to check if a port is up or not at any remote IP or local machine. Here are steps to enable telnet client on Windows 10. Similar approach should also work on other Windows versions.
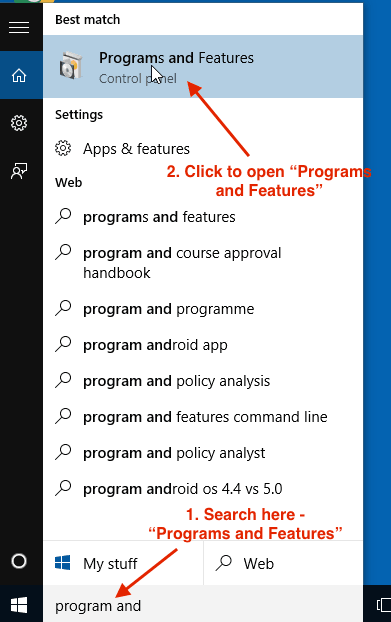
Open Programs and features
Search for “Programs and features” in search box and then click on it to open it.

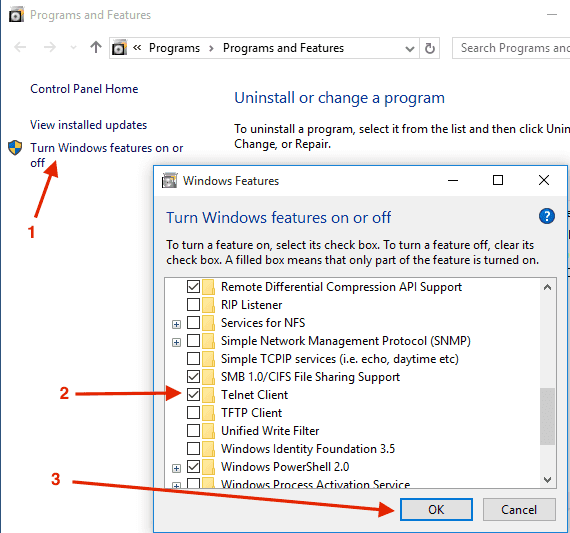
Enable telnet client
Click “turn Windows feature on of off” link in left pane. Select telnet client to enable it and click OK.

Verify if telnet is working
To verify if telnet has been enabled, open command line program and type telnet -h. You should see the following output.
telnet -h
telnet [-a][-e escape char][-f log file][-l user][-t term][host [port]]
 -a      Attempt automatic logon. Same as -l option except uses
         the currently logged on user's name.
 -e      Escape character to enter telnet client prompt.
 -f      File name for client side logging
 -l      Specifies the user name to log in with on the remote system.
         Requires that the remote system support the TELNET ENVIRON option.
 -t      Specifies terminal type.
         Supported term types are vt100, vt52, ansi and vtnt only.
 host    Specifies the hostname or IP address of the remote computer
         to connect to.
 port    Specifies a port number or service name.