At times we need to take timed screenshots on Mac. Here are two approaches we can use to take timed screenshot on Mac.
Screenshot using GUI utility grab
Steps to take screenshot using Grab.
-
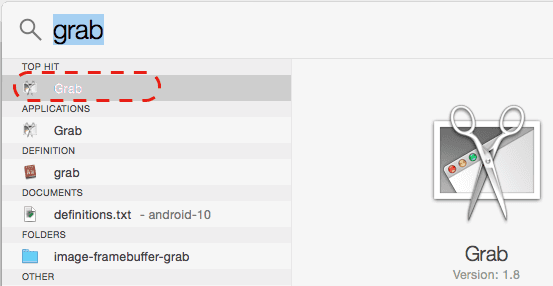
Find grab application in Mac spotlight search and click on it.

-
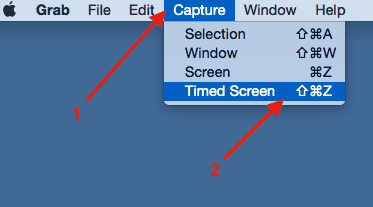
Select Capture Menu and click on Timed capture.

-
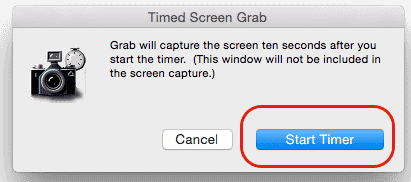
In Timed screen grab window, click on “Start Timer”. Now screenshot will be taken after 10 seconds.

-
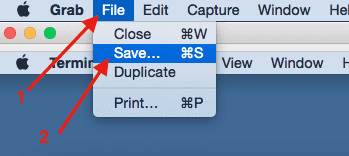
Once you hear screenshot sound, the screenshot picture will appear. Click on Grab File > Save menu to save it. Note that it will be saved in tiff format and later you can convert it to png of some other format using preview.

Screenshot using command line screencapture
Screencapture is awesome command line tool to take screenshots. Some scenarios to take screenshots:
Take screenshot after 10 seconds without cursor
$ screencapture -T 10 screenshot.png
Take screenshot after 10 seconds with cursor
$ screencapture -T 10 -C foo.png
Few points to note about screencapture
- screenshot.png will be generated in current directory.
- screencapture can take screenshot in few other formats like pdf, jpg, tiff also using -t option.